The Best Food Photography Angles to Highlight Your Restaurant Menu
Most “bad menu photos” aren’t bad because the food is bad—they’re bad because the angle doesn’t match the dish. If you pick a consistent angle system, you’ll instantly improve clarity, appetite appeal, and consistency across the menu. Here’s a restaurant-friendly breakdown of the three core angles: top-down (90°), 45°, and straight-on (0°).
If you want a deeper breakdown of choosing the right perspective for a dish, Digital Photography School has a great explanation of finding the “hero angle” and a broader guide to angles for food photography.
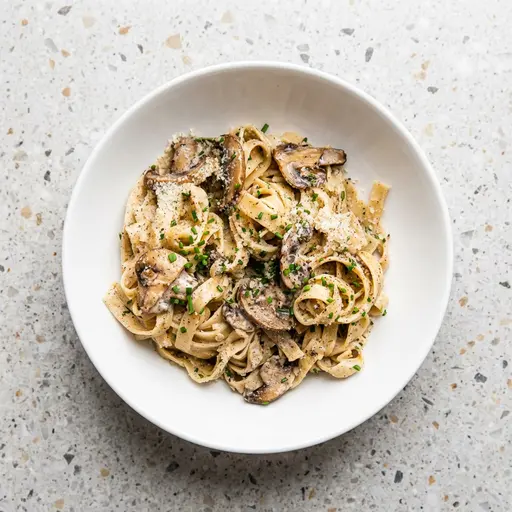
Angle #1: Top-down (90° overhead)
Use overhead when you want to show shape, layout, and ingredients clearly—especially for flatter dishes.
Best for:
- pizzas, salads, bowls, plates with lots of components
- charcuterie boards and spreads
- “set” meals where arrangement matters
Avoid when:
- the dish has height or layers that matter (burgers, cakes)
- you need to show texture/height more than layout
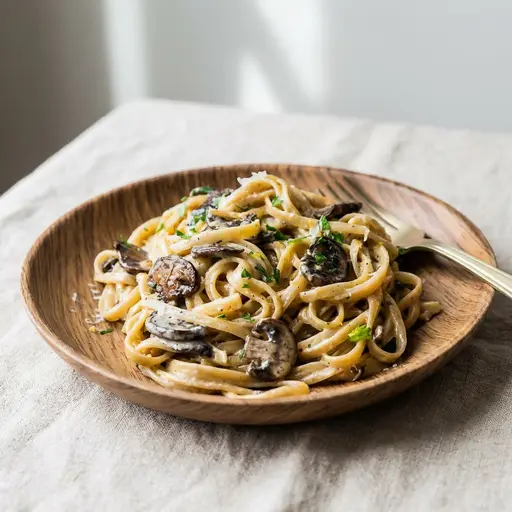
Angle #2: 45° (the menu workhorse)
The 45° angle is often the most versatile. It feels like a diner’s perspective and shows both surface and height.
Best for:
- burgers, sandwiches, stacked items
- pastas, plated entrées
- drinks with garnish and visible depth
Tip: If you choose 45° as your primary angle, keep it consistent across the menu (same distance, same crop, same background).
Sometimes an angled shot works better than overhead for the same dish—you get more depth and appetite appeal. Below, the same mushroom pasta from a 45° angle often reads better on a menu than a flat top-down shot.
Angle #3: Straight-on (0° / eye-level)
Straight-on is perfect for tall or layered foods where the “inside” or height is the selling point.
Best for:
- burgers cut in half (show the filling)
- layer cakes, parfaits, stacked pancakes
- sushi towers, tall cocktails
Avoid when: the dish looks flat from the side (soups, low plates).
How to keep angles consistent across your menu
- Pick 1 primary angle (top-down or 45°) for most items.
- Use straight-on as a “special angle” for tall/layered dishes only.
- Standardize framing: center the dish and leave crop-safe margin.
- Standardize light: window light or diffused light; avoid mixed overhead lighting.
- Standardize background: one surface (or one “set”) across the menu.
Want to standardize your menu fast?
Shoot a quick photo from your chosen angle and let PlatePhoto handle relighting + cleanup so the whole menu looks cohesive.
Consistency is conversion.
Make every angle look professional
Upload a quick phone photo—PlatePhoto relights and cleans it up so your menu looks consistent across dishes and angles.
Read Next
Continue exploring our latest guides and tips
5 Food Photography Mistakes That Are Costing Your Restaurant Orders
Avoid the 5 most common food photography mistakes that are costing your restaurant orders. Learn simple lighting, plating, and camera framing fixes today.
Read articleFoodpanda Photo Guidelines: Best Practices for Faster Menu Approvals
Read our foodpanda photo guidelines and best practices. Use this checklist to format crop-safe menu photos, speed up publishing, and boost conversion.
Read articleZomato Photo Guidelines: Listing Rules & Best Practices for Menus
Get Zomato photo guidelines and listing rules. Follow our step-by-step checklist to upload crop-safe menu photos, pass review, and get more menu orders.
Read article