
Breakfast Photography: 11 Tips for Cafe and Brunch Menus
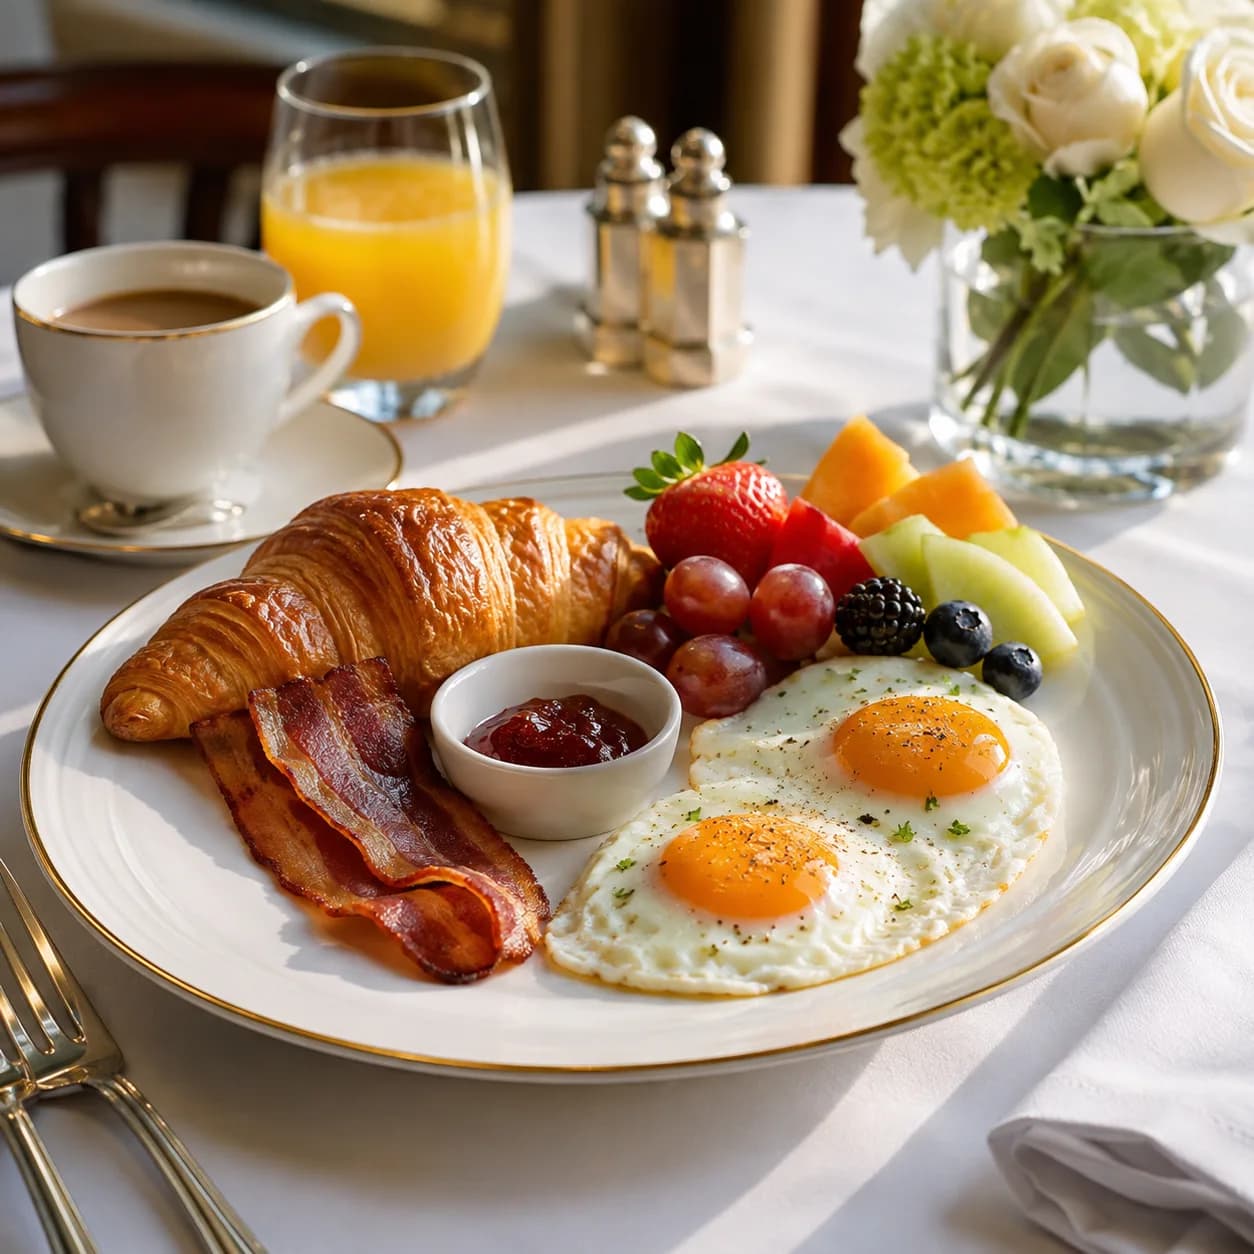
Breakfast photography has a difficult job: it must keep eggs bright, coffee rich, fruit fresh, pastry crisp, and an entire plate easy to understand. The strongest breakfast images feel light and inviting without washing out the food. Use this guide to photograph cafe, hotel, bakery, and brunch dishes for menus, delivery apps, and social media.
1. Build the plate for the camera
Start with the same portion a customer receives. Photography can improve presentation, but it should not create a serving that the kitchen cannot reproduce.
Before the plate reaches the set:
- wipe sauce and grease from the rim,
- keep eggs and toast from covering each other,
- separate foods with similar colors,
- turn the best side of each item toward the camera,
- add garnish only when it is part of service.
A crowded breakfast plate can still photograph well when each component has a visible edge.
2. Use soft side light for a morning feel
Place the breakfast near a window or a large diffused light. Let the light come from the side or slightly behind the plate. This creates shape in pancakes, eggs, toast, and pastries while maintaining a bright atmosphere.
Turn off warm ceiling fixtures if they create yellow highlights. Use a white board opposite the window when coffee cups, meat, or the front of the plate become too dark.
For a setup you can repeat, follow our food photography lighting guide.
Keep a gentle shadow side. Removing every shadow makes pancakes, eggs, and pastry look two-dimensional.
3. Choose an angle based on the dish
Overhead
Best for full breakfast plates, granola bowls, toast arrangements, pastry selections, and table spreads. It makes portions and components easy to understand.
45-degree angle
Best for pancakes, waffles, eggs Benedict, breakfast sandwiches, parfaits, and plates with visible height. It resembles the customer’s view at the table.
Straight-on
Use for tall pancake stacks, layered sandwiches, pastries, and drinks. Keep the camera level so plates, cups, and tables do not appear tilted.
If you are unsure, capture both overhead and 45-degree versions. Our guide to food photography angles for restaurant menus explains how to choose a primary angle for the full menu.
4. Photograph eggs quickly and accurately
Eggs can lose their best appearance within minutes. Coordinate with the kitchen so the light, background, and camera are ready first.
For fried or poached eggs:
- keep whites tidy but natural,
- avoid blown-out highlights,
- angle the yolk toward the light,
- use side light to show shape,
- photograph before the surface dries.
For scrambled eggs and omelets, use a lower angle and side light to show folds and volume. Avoid pushing saturation until the yellow looks artificial.
5. Show height in pancakes and waffles
Photograph stacks from a 45-degree or near-straight-on angle. Align the cleanest edges toward the camera and keep toppings from hiding the layers.
If syrup is part of the dish, capture one clean image before the pour and another immediately after. Too much syrup can remove texture and make the stack collapse visually.
Use a dark or mid-tone backdrop for pale pancakes when you need more edge separation. A light surface can work when the plate has a contrasting rim or shadow.
6. Make coffee and juice support the hero dish
Drinks add breakfast context, but they should not distract from the item being sold.
- Place the drink behind or beside the hero plate.
- Keep the cup handle intentional.
- Wipe drips and fingerprints from glassware.
- Use backlight to make juice glow.
- Check coffee surfaces for distracting reflections.
- Keep branded cups readable when the logo matters.
For a beverage listing, make the drink the hero and simplify the food around it. See our beverage photography guide for glassware, labels, and condensation tips.
7. Keep fruit fresh and believable
Fruit provides useful color contrast, but damaged or dry pieces are highly visible in a close photo.
Choose clean cuts, remove bruised pieces, and add fruit at the end of plating. If fruit is a standard side, show the real portion rather than filling the frame with more than customers receive.
Avoid spraying fruit with excessive water or oil. A subtle natural sheen is enough.
8. Use breakfast props with restraint
A few props can suggest a morning setting:
- neutral napkin,
- simple cutlery,
- coffee cup,
- small syrup container,
- newspaper or menu edge,
- butter or jam served with the dish.
Do not add a large flower arrangement, multiple drinks, scattered ingredients, and several sets of cutlery to a single-item menu photo. Those elements turn a clear product image into a lifestyle scene.
For delivery apps, remove most props and leave crop-safe space around the plate.
9. Choose a background that supports the menu
Breakfast food contains many pale and warm tones: eggs, toast, pancakes, pastry, potatoes, and coffee. Create separation with a light gray, subtle stone, warm wood, or soft charcoal backdrop.
White can still work, but use a plate rim, linen, or directional shadow to keep the dish from blending into the surface. Our food photography backgrounds guide includes twelve practical options.
10. Capture the right crops while food is fresh
Plan the deliverables before the kitchen starts:
- square image for delivery listings,
- landscape hero image for the website,
- vertical crop for social stories,
- clean overhead menu image,
- one detail shot for a carousel or promotion.
Compose each frame intentionally. A wide dining-table image may not contain enough resolution or safe space for a strong square crop.
You can test the final crop with the delivery app image resize tool.
11. Keep the full breakfast menu consistent
Choose a visual system and document it:
- one primary background,
- one main camera angle,
- one light direction,
- standard plate position,
- repeatable crop and brightness,
- a short prop list.
Use an approved image as the reference for every new item. This is especially important for cafes and hotels that update pastries, seasonal drinks, and specials frequently.
Shot guide by breakfast item
Eggs Benedict
Use a 45-degree angle to show the muffin, filling, egg, and sauce. Side light helps define the layers. Capture a second image after cutting one egg only if the flowing yolk remains clean and appetizing.
Breakfast sandwich
Turn the cut side toward the camera. Use a low 45-degree angle and keep the filling visible. A simple background prevents the stacked ingredients from becoming confusing.
Pastry or croissant
Use side light to reveal flaky layers. Photograph one hero pastry at 45 degrees, then an overhead group image for a bakery selection.
Oatmeal, yogurt, or granola bowl
Overhead is usually clearest. Keep toppings organized in a way the kitchen can reproduce, and leave some of the base visible so customers understand the dish.
Full English or American breakfast
Use overhead or a high 45-degree view. Separate components slightly and make the hero items—often eggs, bacon, or sausage—easy to identify.
Breakfast buffet
Capture a wide establishing image plus closer photos of each station. Keep serving utensils aligned and replace depleted trays before photographing. Our buffet food photography page covers larger displays.
Common breakfast photography mistakes
Shooting after the dish has been waiting
Dry eggs, wilted herbs, soft toast, and melted whipped cream are difficult to fix convincingly. Prepare the set before the food.
Making every item equally prominent
Choose one hero. Supporting items provide context but should not compete in size, focus, and contrast.
Overexposing white plates and eggs
Check the brightest areas before increasing exposure. Preserve detail, then adjust the overall image carefully.
Using heavy warm filters
Warmth can feel inviting, but too much turns eggs, cream, plates, and table linens yellow. Keep whites neutral and food color realistic.
Publishing mismatched crops
A breakfast menu looks less professional when some plates are tiny and others touch the frame. Standardize the scale and empty space around each dish.
Breakfast photography FAQ
What is the best angle for breakfast photography?
Use overhead for plates with many components and 45 degrees for stacked or layered dishes. Photograph tall drinks and pancake stacks closer to eye level.
How do you photograph breakfast in a dark restaurant?
Use one large diffused LED or flash to imitate window light. Turn off conflicting overhead fixtures and stabilize the phone or camera.
How do you keep eggs looking good in photos?
Prepare the set before cooking, photograph promptly, use soft side light, and protect detail in the whites and yolks.
Can AI improve breakfast menu photos?
Yes. A sharp source image can be relit, cleaned up, and placed into a consistent visual style. Keep the real dish clearly visible and avoid hiding important edges with props.
Make every breakfast item look ready to order
Turn a simple phone photo into a polished, consistent menu image with PlatePhoto.
Read Next
Continue exploring our latest guides and tips
Cake Photography: 10 Tips for Bakeries and Dessert Menus
Photograph cakes with clean layers, accurate color, and appetizing texture. Use these practical tips for whole cakes, slices, and bakery menu photos.
Read articleBread Photography: 10 Tips for Bakery and Cafe Photos
Photograph bread with crisp crust, visible crumb, and natural color. Follow this bakery-friendly guide for loaves, slices, pastries, and menu images.
Read articleFood Photography Angles for Restaurant Menus
Discover the best food photography angles for restaurant menus. Learn exactly when to shoot overhead, 45-degree, or straight-on to show off your dishes.
Read article