
Food Photography Lighting: A Practical Setup Guide
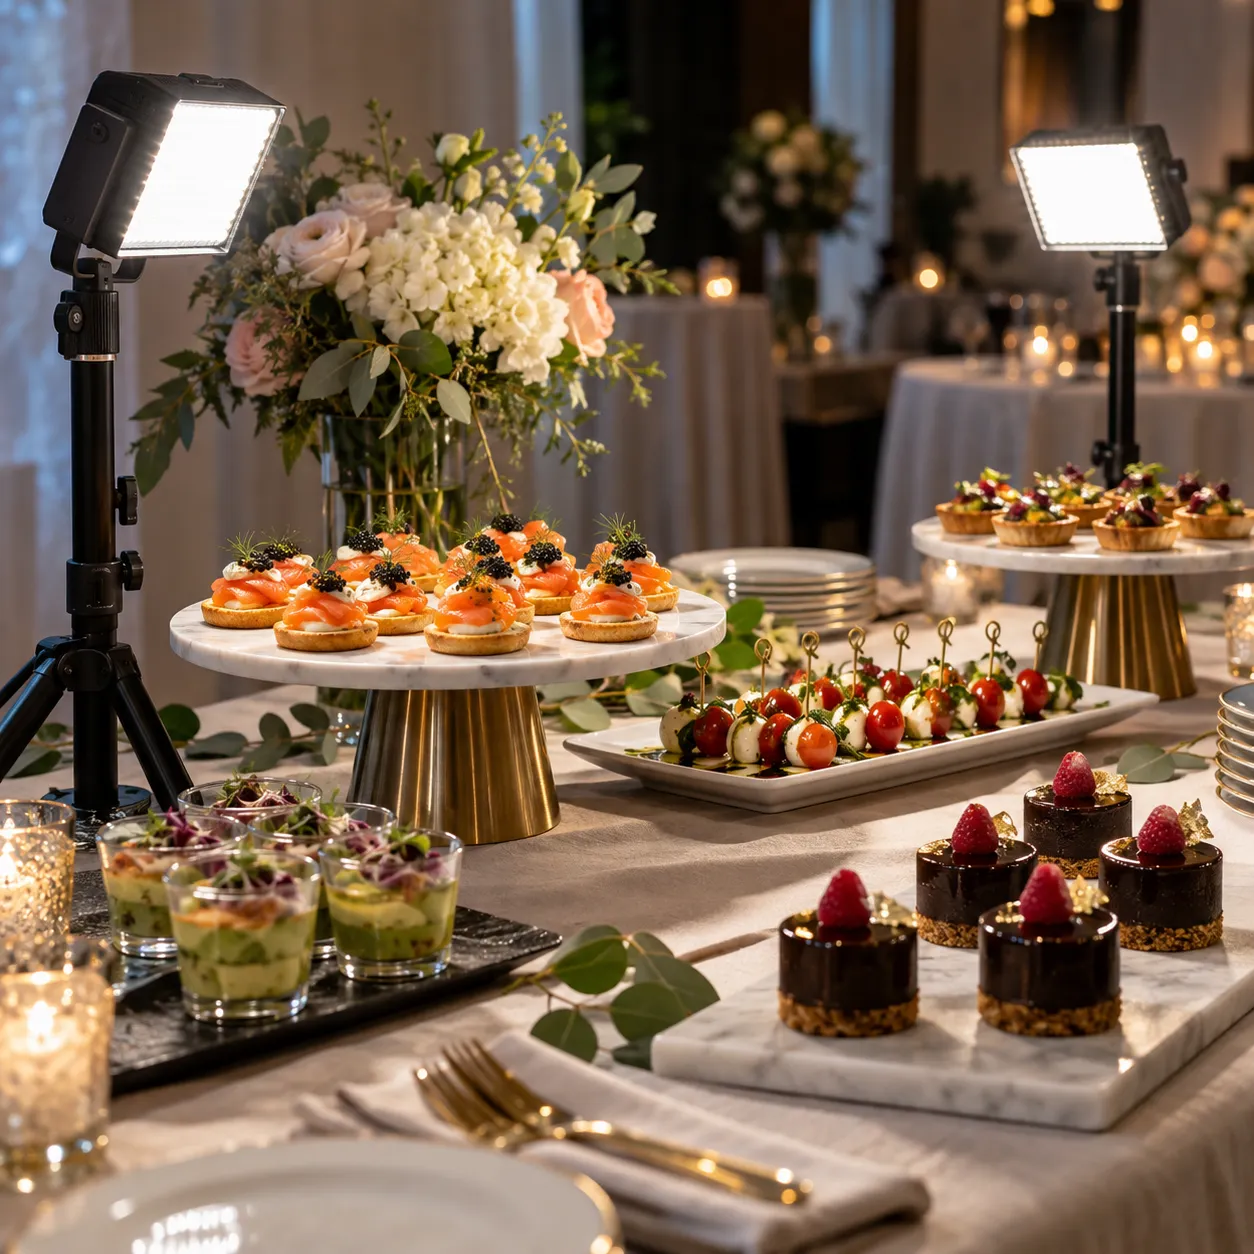
Good food photography lighting does not require a studio full of equipment. For most restaurant menu photos, one large, soft light placed to the side or slightly behind the dish is enough. The goal is not to make every surface equally bright. It is to reveal texture, keep colors believable, and give the food a clear shape.
This guide covers a natural-light setup, a repeatable artificial-light setup, and practical fixes for the most common lighting problems.
The quick answer: start with one large light
If you need a dependable setup today, use this arrangement:
- Place the dish beside a window or one diffused light.
- Keep the light at roughly a 45-degree angle behind the plate.
- Put a white board on the opposite side to soften dark shadows.
- Turn off ceiling lights so different color temperatures do not mix.
- Adjust the board before adding another light.
This setup works because side-back lighting adds dimension without flattening the food. It creates highlights on sauces and drinks while leaving enough shadow to show shape.
Move the light closer to make it softer. A large light close to the dish creates gentler transitions than a small light far away.
Natural light food photography near a window
Window light is often the easiest starting point for a cafe, bakery, or restaurant team. Choose a window that does not receive harsh direct sun during the shoot.
Build the setup
- Put the table 2 to 4 feet from the window.
- Rotate the dish until the light comes from the side or rear quarter.
- Hang a sheer white curtain if direct sunlight creates hard-edged shadows.
- Place white foam board opposite the window to return a little light into the dish.
- Use a black board instead when you want deeper shadows and a moodier result.
Do not push the plate directly against the window. Moving it back gives you more control and often produces a smoother falloff across the scene.
Keep natural light consistent
Clouds, time of day, and changing weather can alter brightness during a menu shoot. Photograph one test dish, note the table position, and use the same camera exposure for the remaining items when possible. If the light changes noticeably, pause rather than creating a menu with mismatched brightness.
A one-light food photography setup
Artificial light is useful when you need to shoot after service, photograph many menu items, or reproduce the same look across locations.
You need:
- one daylight-balanced LED or flash,
- a softbox or diffusion panel,
- a stand,
- white foam board or a reflector,
- optional black card for controlling reflections.
Place the light to the side and slightly behind the dish. Start with the softbox about 2 feet from the plate, then move it closer or farther based on the size of the scene. Position the white board on the shadow side.
Avoid aiming a bare LED panel directly at the food. Even if the image is bright enough, the small apparent light source can create sharp highlights, hard shadows, and oily reflections. Diffusion makes the source appear larger and more flattering.
Side light, backlight, or front light?
Side lighting
Side lighting is the safest choice for most dishes. It reveals texture on bread, grilled meat, salads, pastries, and layered desserts. It also works well for the 45-degree camera angle used on many menus.
Backlighting
Backlighting is useful for drinks, soups, glossy sauces, and steam. Keep the light just outside the frame and add a white card near the camera if the front of the dish becomes too dark.
Watch for lens flare. A small black card between the light and lens can block stray light without changing the light on the food.
Front lighting
Front lighting can remove too much depth, especially when the light is close to the camera. Use it sparingly for clean, catalog-style images where even visibility matters more than texture.
For more help choosing the camera position that matches the light, see our guide to food photography angles for restaurant menus.
Best lighting by type of food
Burgers, sandwiches, and layer cakes
Use side light from slightly above the food. This reveals stacked layers while keeping the front visible. Add a white card near the camera if the filling is too dark.
Pizza, salads, and flat lays
For an overhead photo, raise the light and let it skim across the surface from one side. This creates small shadows that separate toppings and ingredients.
Drinks and glassware
Move the light behind the drink and diffuse it well. Use black cards outside the frame to define the glass edges. Check labels and garnishes for distracting glare before taking the final shot.
Soups, glazes, and glossy food
Large diffusion is especially important. Move the light until the highlight describes the food without becoming a blown-out white patch.
How to fix common food photography lighting problems
The food looks flat
Move the main light away from the camera axis. Reduce fill by moving the white board farther away or replacing it with a black card.
Shadows are too dark
Bring a white board closer to the plate. If that is not enough, increase the exposure slightly before adding a second lamp.
The image looks yellow or green
Turn off ceiling lights and nearby heat lamps. Mixed lighting is difficult to correct because separate parts of the dish receive different color casts. Use one type of light and set white balance from a neutral gray or white reference.
Sauce and plates have harsh glare
Raise or rotate the light so the reflection moves away from the camera. A larger diffuser also makes highlights broader and less distracting.
The photo is bright but still looks unappetizing
Brightness alone is not the goal. Check for flat front light, incorrect white balance, clipped highlights, and shadows falling across the hero ingredient. Our guide to common food photography mistakes covers the other issues that often appear alongside poor lighting.
Phone camera tips for low-light restaurants
- Clean the lens before every shoot.
- Use the main rear camera instead of digital zoom.
- Tap the hero ingredient to set focus.
- Lower exposure slightly if white plates or glossy sauces lose detail.
- Brace the phone or use a small tripod instead of relying on night mode for every shot.
- Do not combine window light with warm dining-room fixtures.
A phone can produce a strong source photo when the light direction is intentional. If the restaurant is too dark for a clean exposure, bring in one diffused light rather than trying to rescue severe blur later.
A repeatable lighting workflow for a full menu
Create a simple reference before the first dish leaves the kitchen:
- Mark the plate position with removable tape.
- Mark the tripod or phone position.
- Record the light height, angle, and distance.
- Keep one reference photo open while shooting.
- Check every fifth dish for brightness, crop, and color consistency.
Once the setup is stable, change the food—not the lighting. That discipline makes a menu feel cohesive and reduces editing time.
If you still have uneven results from different days or locations, AI food photography can help standardize backgrounds, lighting, and presentation while preserving the recognizable dish.
Food photography lighting FAQ
What is the best lighting for food photography?
A large, diffused light placed to the side or slightly behind the dish is the most versatile option. A window can provide this naturally; a softbox can reproduce it on demand.
Is natural or artificial light better?
Neither is automatically better. Natural light is simple and inexpensive, while artificial light offers consistency and scheduling control. Choose the source your team can repeat.
Do I need two lights?
Usually not. Begin with one light and a reflector. A second light can create conflicting shadows and extra reflections if it does not have a specific purpose.
What color temperature should I use?
Use a daylight-balanced source and avoid mixing it with warm overhead fixtures. Accurate white balance matters more than chasing one exact Kelvin value.
Can AI fix bad food photography lighting?
AI can improve exposure, color, and consistency, but a sharp source photo with visible food detail gives it more to work with. Start with clean directional light whenever possible.
Fix the lighting without rebuilding your setup
Upload a dish photo and use PlatePhoto to create a brighter, cleaner, more consistent menu image.
Read Next
Continue exploring our latest guides and tips
Food Photography Backgrounds: 12 Practical Backdrop Ideas
Choose food photography backgrounds that make dishes stand out. Compare affordable backdrop materials, colors, textures, and restaurant-ready setups.
Read article5 Food Photography Mistakes Costing You Orders
Avoid the 5 most common food photography mistakes that are costing your restaurant orders. Learn simple lighting, plating, and camera framing fixes today.
Read articleBread Photography: 10 Tips for Bakery and Cafe Photos
Photograph bread with crisp crust, visible crumb, and natural color. Follow this bakery-friendly guide for loaves, slices, pastries, and menu images.
Read article