
Bread Photography: 10 Tips for Bakery and Cafe Photos
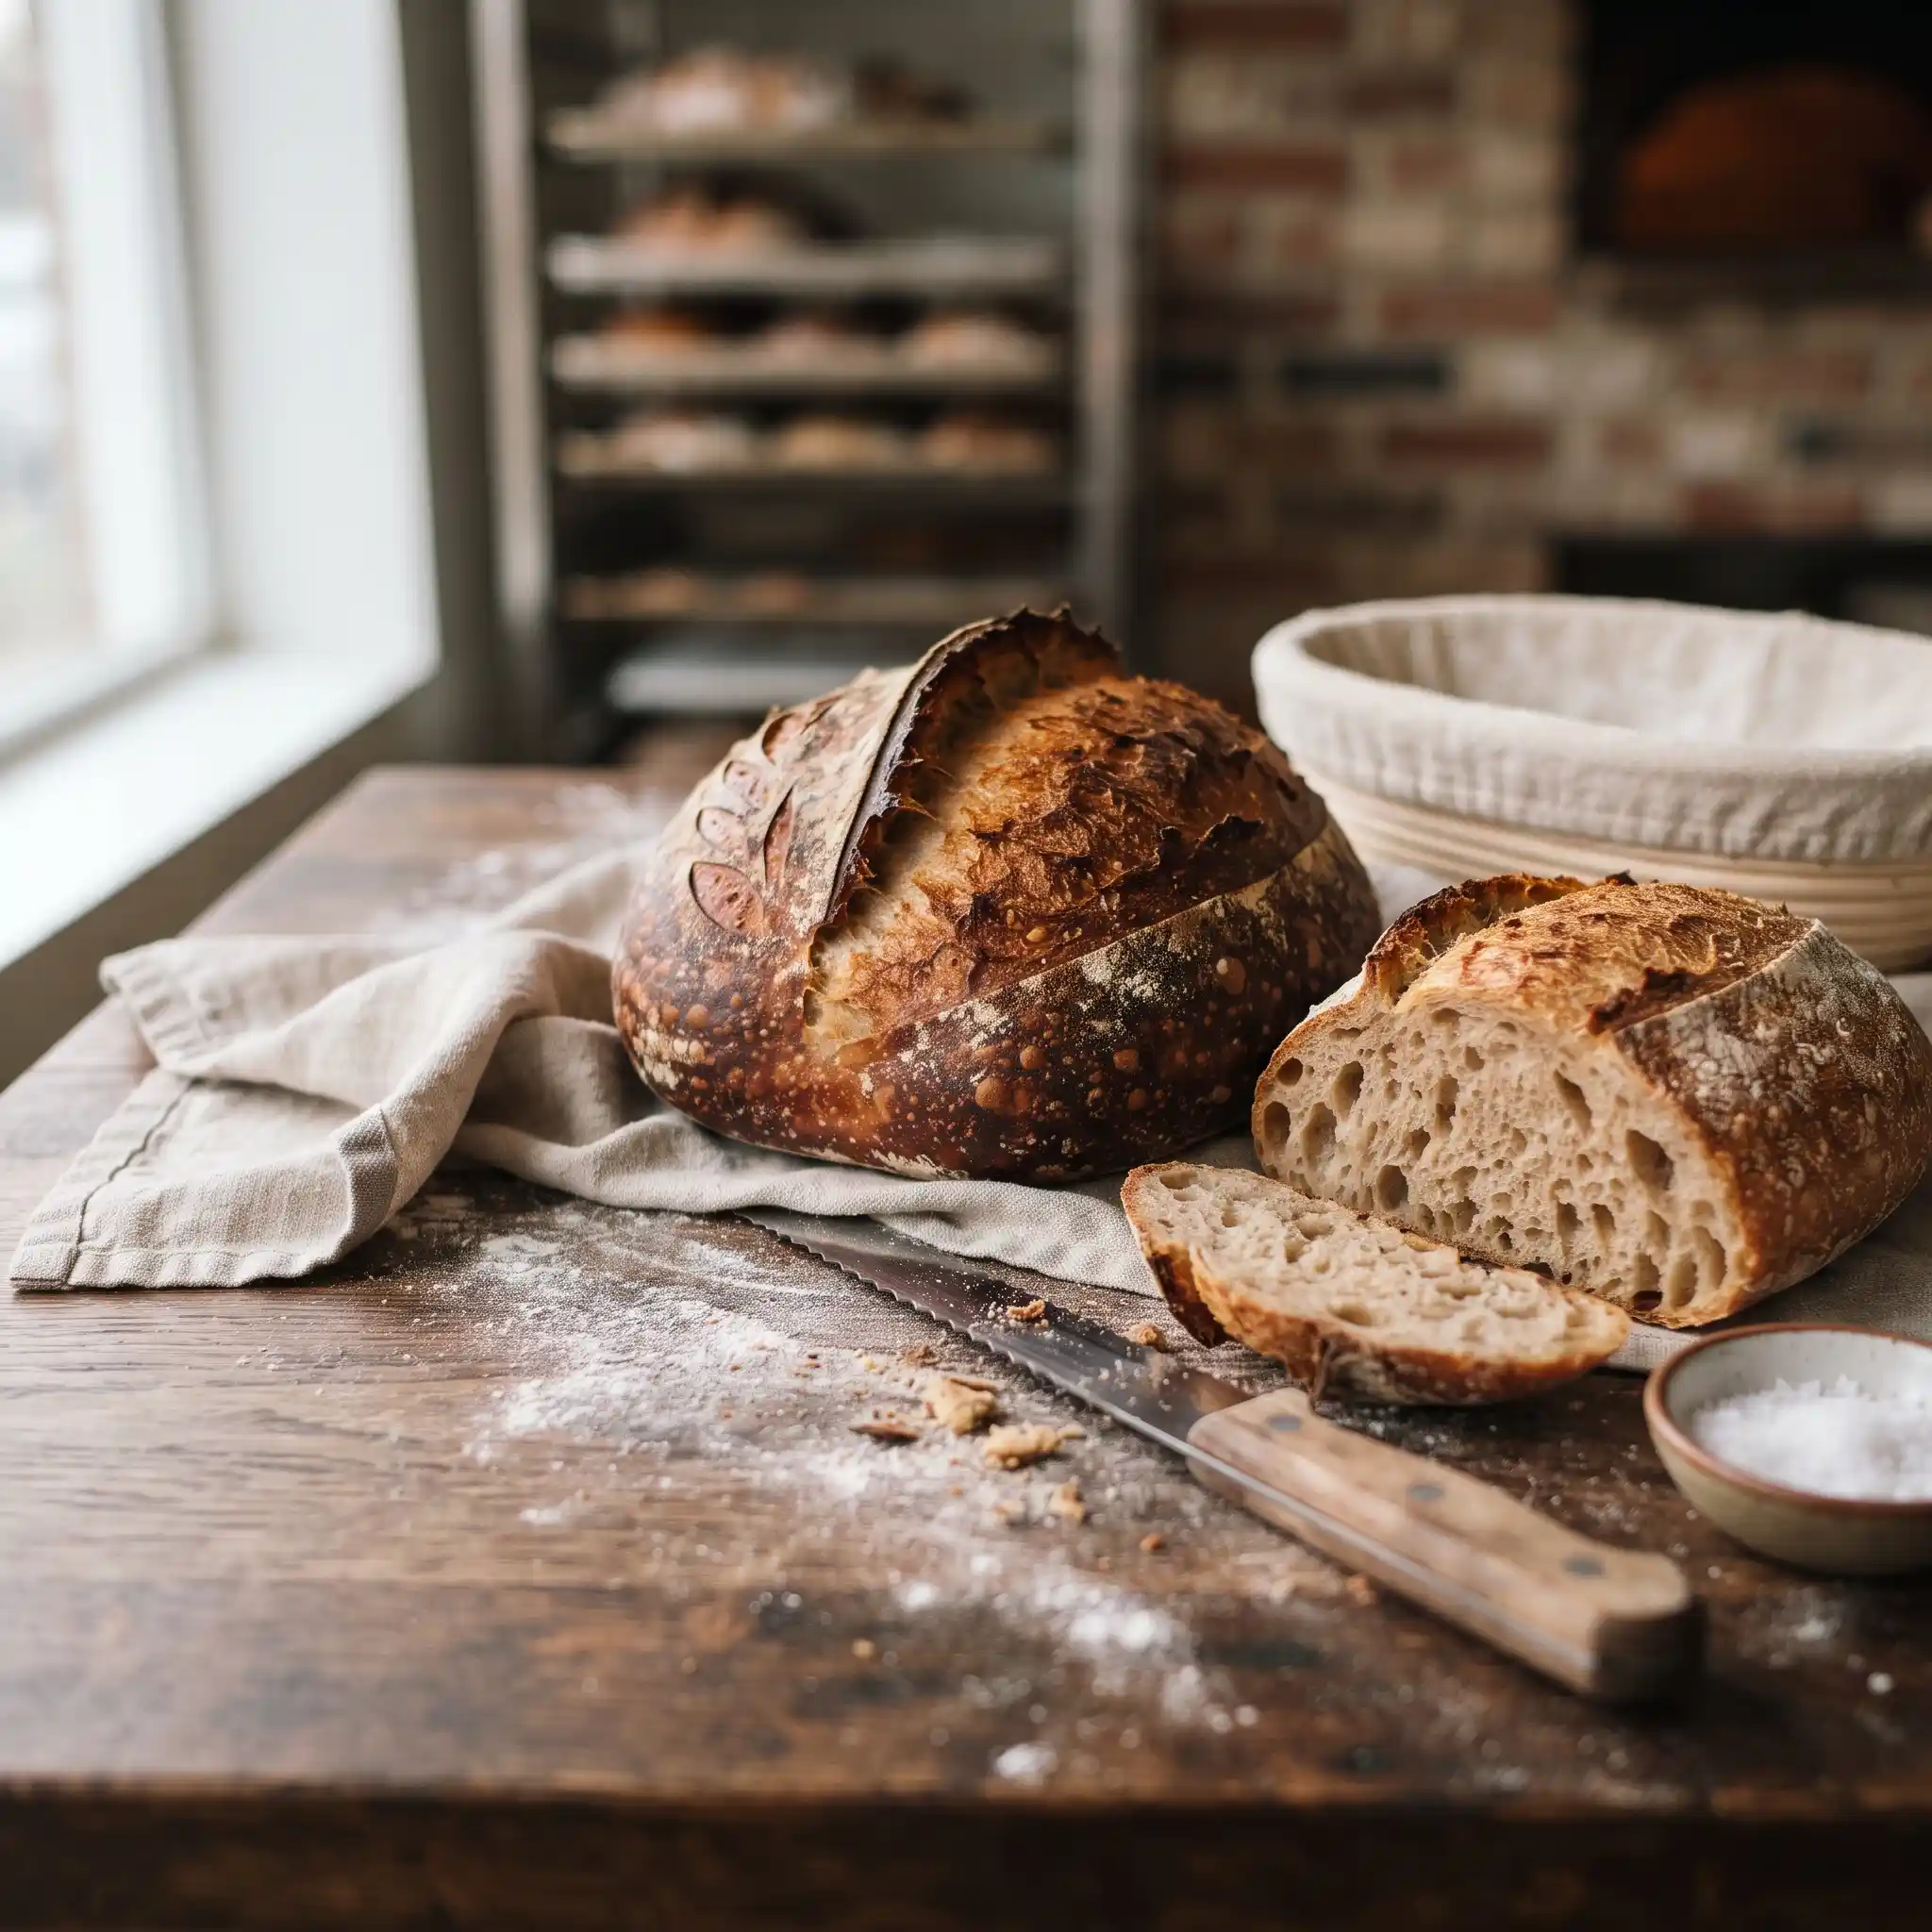
Successful bread photography makes customers imagine the crust before they take a bite. The image should show shape, browning, texture, and crumb while keeping the loaf recognizable. Whether you are photographing sourdough for a bakery website or a breakfast sandwich for a menu, a few controlled decisions make the biggest difference.
Use these ten tips to photograph bread efficiently with a phone or camera.
1. Photograph bread while it still looks fresh
Plan the shot before the loaf is ready. Set the background, light, camera, knife, and serving board in advance so the bread does not sit uncovered while you build the scene.
Fresh bread changes as it cools:
- steam disappears,
- cut surfaces begin to dry,
- crisp crust can soften,
- butter and fillings lose their ideal texture.
You do not need to photograph bread straight from the oven. In fact, slicing too early can compress the crumb. Let the loaf rest for the time your baker recommends, then move quickly once it is ready to cut.
2. Use side light to reveal the crust
Place a window or diffused light to one side of the loaf. Side light creates small shadows across scoring, flour, seeds, blistering, and flaky layers.
Front light can make the same loaf look flat. If the shadow side becomes too dark, place white foam board opposite the light. For exact placement, follow the setup in our food photography lighting guide.
Flour and pale scoring can lose detail before the rest of the loaf looks bright enough. Lower the exposure slightly and lift darker areas later if needed.
3. Choose the angle for the bread’s selling point
Straight-on or low 45-degree angle
Use this for tall loaves, baguettes, buns, croissants, and sandwiches. It shows height, crust, and layers.
Overhead
Use overhead for a bread basket, multiple pastries, rolls, flatbreads, or a styled breakfast spread. Leave room around the arrangement for menu and social crops.
Close-up
Use a detail shot to show open crumb, seeds, lamination, glaze, or a crisp edge. A close-up supports the main menu photo; it should not be the only image if customers need to understand the full product.
See our complete guide to food photography angles for more examples.
4. Show the crumb without damaging it
For sourdough, sandwich bread, brioche, and filled loaves, the interior is often as important as the crust.
- Use a sharp serrated knife.
- Saw gently instead of pressing down.
- Wipe loose crumbs from the cut face.
- Angle one half toward the light.
- Keep a few natural crumbs on the board, but remove anything that looks stale or messy.
If the loaf has a particularly open crumb, photograph the cut surface slightly off-axis. Light skimming across the holes gives them depth.
5. Select a background that fits the bakery
Bread works well with matte, tactile surfaces:
- warm wood for rustic loaves,
- pale stone for modern bakeries,
- parchment for casual takeaway products,
- dark gray for flour-dusted artisan bread,
- light neutral surfaces for colorful sandwiches and pastries.
Avoid backgrounds with a similar color and brightness to the crust. A brown loaf on orange-brown wood may lose its outline. Add contrast with parchment, linen, a cooling rack, or a different board.
Our guide to food photography backgrounds explains how to build a repeatable two-surface kit.
6. Use only a few bakery props
Props should explain scale, flavor, or serving context. Good options include:
- a bread knife,
- a cooling rack,
- neutral linen,
- butter or preserves,
- a small amount of the featured grain or seed,
- a bakery bag or branded label.
Do not surround the loaf with every ingredient used in the recipe. Too many props make the scene feel like a recipe illustration instead of a product customers can order.
7. Control crumbs, flour, and shine
Texture creates appetite appeal, but uncontrolled mess reads as poor preparation.
Place crumbs deliberately near the cut area. Brush away burnt fragments and fine debris from the rest of the set. If you add flour, use a light amount that makes sense for the product rather than covering the scene.
For glazed bread and pastries, rotate the light until the glaze has a soft highlight. A bright white reflection can hide color and texture.
8. Photograph several useful versions
A bakery often needs the same product in different contexts. Capture a small shot list while the setup is ready:
- full loaf or whole product,
- cut-open view,
- serving portion,
- close-up texture,
- square composition for delivery and social,
- landscape composition for the website,
- vertical composition for stories or posters.
Move the camera or rearrange the product for each crop. Do not assume one wide image can be cropped into every format.
9. Keep bread color accurate
Warm color can make bread inviting, but too much warmth turns pale crumb yellow and overstates browning.
Turn off mixed overhead lights, set white balance from a neutral reference, and compare the image to the real product. The customer should recognize what arrives.
Be careful with:
- aggressive orange filters,
- heavy clarity that makes crust look dry,
- excessive saturation,
- sharpening that exaggerates crumbs,
- shadow recovery that removes all depth.
10. Standardize the bakery’s visual style
Choose a repeatable system for:
- primary camera angle,
- background,
- plate or board,
- light direction,
- crop,
- brightness,
- garnish and packaging placement.
Consistency matters when a customer compares several products on one menu. A coherent set also makes seasonal additions easier to photograph later.
For a broader workflow covering bread, cakes, cookies, and pastries, visit our bakery food photography page.
Bread photography setups by product
Artisan loaf or sourdough
Use side light, a 45-degree camera angle, and one cut section. Keep the background simple so scoring and crumb remain the focus.
Baguette
Use a diagonal composition to fit the length into the frame. Show at least one end and leave room around the loaf so it does not feel cropped accidentally.
Croissants and laminated pastry
Use low side light to reveal layers. Photograph one pastry at a 45-degree angle, then add an overhead group image for variety.
Sandwiches and filled buns
Turn the cut side toward the camera and light from the side. Keep fillings neat but believable. Straight-on or a low 45-degree view usually shows the layers best.
Packaged bread
Capture one image of the packaging clearly, one unwrapped product image, and one serving suggestion. Keep labels readable and avoid reflections across the brand name.
A five-minute bakery photo checklist
Before shooting:
- Clean the lens and background.
- Confirm the loaf has rested enough to cut.
- Turn off mixed-color overhead lights.
- Set the hero angle and crop.
- Prepare all props and packaging.
Before publishing:
- Check that crust and crumb remain sharp.
- Compare the color to the real bread.
- Remove distracting crumbs and glare.
- Confirm safe margins for each platform.
- Check consistency against existing menu images.
You can use the menu photo grader for a quick review before adding the image to your menu.
Bread photography FAQ
What is the best light for bread photography?
Large, soft side light is the most versatile. It reveals crust texture and crumb without creating harsh reflections.
How do you make bread look fresh in photos?
Prepare the set first, photograph soon after the loaf has cooled enough to cut, use accurate color, and show the crust and crumb clearly.
What angle is best for a loaf of bread?
A 45-degree or slightly lower angle shows the loaf’s height and surface. Add an overhead image when photographing several products or a bread basket.
Can I photograph bakery products with a phone?
Yes. Use the main rear camera, soft directional light, a stable position, and a clean lens. Avoid digital zoom and heavy filters.
Turn a quick bakery photo into a polished menu image
Upload your bread or pastry photo and let PlatePhoto refine the lighting, setting, and consistency.
Read Next
Continue exploring our latest guides and tips
Breakfast Photography: 11 Tips for Cafe and Brunch Menus
Create bright, appetizing breakfast photos for cafe and brunch menus. Learn how to style eggs, pancakes, coffee, pastries, and full breakfast plates.
Read articleFood Photography Backgrounds: 12 Practical Backdrop Ideas
Choose food photography backgrounds that make dishes stand out. Compare affordable backdrop materials, colors, textures, and restaurant-ready setups.
Read articleCake Photography: 10 Tips for Bakeries and Dessert Menus
Photograph cakes with clean layers, accurate color, and appetizing texture. Use these practical tips for whole cakes, slices, and bakery menu photos.
Read article